My most popular image on Flickr is, sadly, not one of my photographs. It's a screenshot from an old blog post about how to include images from Flickr in Web pages. But the number of views it's gotten (currently just under 4000), along with my latest photo blogging, makes me think it's time to reprise and indeed expand my article so that it covers adding images from Flickr to blog posts (especially, but not exclusively) created with Blogger.
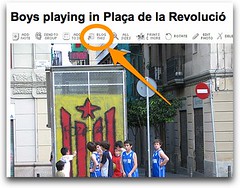
There are lots of ways of adding images from Flickr to your Blogger posts. The easiest, but least flexible, is by using Flickr's tools to blog your photos. First, tell Flickr where you are blogging. You can choose from a few layouts by clicking the Layout link next to your blog name. Then, when you want to blog about a photo from your Flickr stream, click the "Blog This" button above the desired photo:
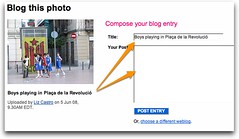
You'll then get a menu where you can choose the blog that you want to post to, and then two fields next to a small version of your photo. In the first will be the current title of the selected photo. This will be the Subject of your blog post. In the second will be where you can write your blog entry:
Fill in the fields, click Post Entry and your new post will almost magically appear over on your blog.
If you want to blog about a single photo, this method is all right, but it falls down hard if you want to add any additional photos or formatting. Unfortunately, you are limited to writing a plain text entry, and you can't add labels either. These are big negatives for me and so I almost always use a different method, which I explain in part 2 (about Blogger's Insert Images button) and part 3 (about adding the code manually--my preferred technique).
In part 4, I'll show you how to wrap text around your Flickr images that link to Flickr.
Sunday, August 31, 2008
Thursday, August 21, 2008
Non-breaking spaces in FileMaker Pro
One of my quirks is a lifelong love affair with databases (which many would put in the same category as bowling and prunes). Today I was working on a mail merge system for a local non-profit, and I needed a non-breaking space in my letter to keep "July" and "27" on the same line. It's Option-Space. It doesn't show up in my Calculation field, but when I browse the letters, my date stays together and looks much better.
Labels:
tech,
tips,
troubleshooting
Wednesday, August 20, 2008
Little Brother
Just finished reading Cory Doctorow's new book, Little Brother, about a teenage's boy's fight against an excessive crackdown by the Department of Homeland Security after a terrorist attack in San Francisco. I read a negative review on Amazon which rightly complained about the cookie cutter bad guys and lack of evidence that our hero is such a great hacker, but I still think they sort of missed the point.
As I've been worrying about the world and dread reading the news, I am often given hope by hackers and visionaries who might have looked like the protagonist when they were a few years younger. These are people who hold dear the ideals on which this country was founded--rights to privacy, freedom of press, expression, assembly, religion, and to be treated fairly and equally before the law--and who have the technological power to defend them. I love passing that hope on to my daughter when she asks me, "Why do they do that?" in response to the news of some corrupt government official.
She's actually the intended audience for this "young adult" book, and she really liked it, calling it "very intense". I highly recommend reading it yourself and then sharing it with your kids. We need to have hope.
Sunday, August 17, 2008
Country Bumpkin in the Big City
Yesterday, my old Nokia phone finally refused to charge. Of course, I was sort of pleased, since that was the last obstacle between me and an iPhone... This morning, I decided to drive down to the Apple store. As I was getting dressed, I looked at the pants that I was putting on and noticed the specks of grass that were still on them from when I weed-whacked around the pig fence yesterday afternoon. It made me feel like a country bumpkin on my way to the big city.
The strange thing was I kind of liked the feeling. I also like being a technology addict here in my small town. And I realized I also like being an American in Barcelona, and a Catalan in the US. I often worry that I don't quite fit in, but maybe it's because I don't completely want to; there are these big important parts of me that stick out, that I like having stick out. I remember when I was little, my sisters would tease me for watching bowling on TV and eating prunes (back before they were dried plums). These were things most 8-year-olds didn't do, but they were totally me.
And I suppose the only reason it's curious is because I spend a fair bit of time wondering if I belong anywhere, and often feel a bit like an alien. Probably much of the problem is imagining that anyone could fit in a box labeled "country bumpkin" or "technology addict"; no-one is that one-sided. But I do think that part of my alienation (though that's a strong word) comes from liking very disparate things: sewing and PHP, bowling and local food, politics and pumpkins.
Thursday, August 14, 2008
So, what is a Wiki anyway?
It has not escaped my attention that, despite the name of my other blog, there has been not a single entry about wikis since I started writing two weeks ago. Part of the reason is that I was spending an awful lot of time creating a movie for the Ashfield Film Festival, but the most important reason is that I wasn't sure how to start. Perhaps an introduction will do the job.
Readers, meet wikis, wikis, meet readers.
Let me tell you a little about wikis. The name is the most intimidating part, but has the best story. The guy who developed the first wiki software, Ward Cunningham, named his invention after the Wiki Wiki shuttle bus at Honolulu Airport. Wiki is Hawaiian for "fast". But fast only tells part of the story. There are two more things about wikis that make them really valuable tools.
First, wikis can be used to create web pages collaboratively. Wikipedia is a prime example. You, me, and the postman can go on to Wikipedia and add or edit the web pages that are there, thanks to the wiki software that Wikipedia runs on.
But wikis don't have to be a joint effort. I've been using them to create Web sites for friends and family members, like, for example, my Dad's painting site. The advantage is that a wiki is incredibly easy to edit, which means that once it's designed and set up, it's easy for the Web site owner, like my Dad, to update the information on his own Web site, create new pages and links between pages, and more, without knowing HTML, and without having to upload pages through FTP.
So, again, what is a wiki? It's a web site generated with wiki software (like MediaWiki or PmWiki) that can be edited collaboratively. Once the web site (often called a wiki) is set up, pages can be created and/or edited without any knowledge of HTML or FTP.
Tuesday, August 12, 2008
My new "semi-personal" blog
I wanted to invite you all to visit my new blog, Pigs, Gourds, and Wikis. The name comes from the three big interests in my life right now:
I hope you enjoy it!
- pigs (but we also have chickens, goats, rabbits, lots of cats, a big huge dog, a similarly sized cow, and a very large pumpkin and gourd patch),
- gourds (actually, I love most crafts, I even consider HTML a craft... it's just another way of making things with your hands. Apart from carving gourds, I'm also very into sewing and knitting),
- and wikis (or anything technical. I'm embarrassed to admit that to date there's not a single entry about wikis, though I mean to get there, but there are other geeky, troubleshooting related posts).
I hope you enjoy it!
Widescreen movies in QuickTime
or, Happy Birthday, Cecil
It's a little known fact that Cecil B. Demille was born while his parents were vacationing in Ashfield, Massachusetts on August 12, 1881. Perhaps for that reason, or more probably because it was a lucky excuse, a group of Ashfield residents began the Ashfield Film Festival, whose deadline for submissions is, not surprisingly, August 12. That's today.
I finished my movie yesterday morning and spent the better part of the day insisting that FinalCut really export it in widescreen format, that iDVD really keep it in widescreen format, and that my projector really display it in widescreen format. The best tips I found were from a post on Apple's iDVD support forum which referenced this article.
Basically, even though you've shot and edited your movie in widescreen format, you have to follow a special process to keep it widescreen in QuickTime. First, export the movie as a standalone QuickTime Movie (not using QuickTime Conversion). Then open that movie with QuickTime player and, through the Movie Properties box (Command-J), change the movie's size to 853 x 480 pixels. Save the changes and then you're ready to import it into iDVD. Don't forget to check the widescreen option in iDVD when you begin your project.
Oh, and if you want to see my movie, come to the Ashfield Film Festival, 7pm, September 20th. You'll also be able to see all of the movies on YouTube sometime after the festival. I'll be sure and post a link here.
Thursday, August 07, 2008
Line breaks in Blogger Blog titles
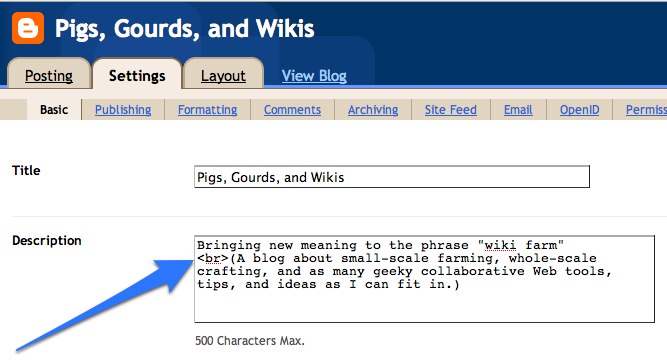
I just changed the "Description" of my other blog, that bit that goes right under the title. If you have your own blog, you may have noticed that Blogger controls the line breaks in your description. Even if you add a regular line break, the lines all flow together when you go to view your blog.
But I wanted Bringing new meaning to the phrase "Wiki Farm" to be on its own line.
The answer? Add <br> (which is the HTML code for a line break) where the new line should begin.
As you can see at the top of this very page, the rest of my description starts on its own line, just as I wished.
But I wanted Bringing new meaning to the phrase "Wiki Farm" to be on its own line.
The answer? Add <br> (which is the HTML code for a line break) where the new line should begin.
As you can see at the top of this very page, the rest of my description starts on its own line, just as I wished.
Tuesday, August 05, 2008
Subscribing to a blog
I've been talking and thinking about blogs a lot. I thought I only read two: O'Reilly Radar, which is a technical blog about "insight, analysis and research about emerging technologies" and Zeldman.com which is a blog written by Web design and standards guru, Jeffrey Zeldman. But each day when I go to my personalized Google page, I am reminded that I am subscribed to a few more than two. I don't actually read every post every day, but by having new posts appear on my iGoogle page, I can see which ones I want to read and skip the ones I don't have time for.
Why subscribe to a blog? I am just not the kind of person to remember to go to different sites and see if there's something new. By subscribing to a blog, I can see when there is a new post, and even read that post (or sometimes an excerpt of it) without going anywhere special (or remembering any addresses).
There are stand-alone programs (RSS readers) that let you follow blog posts, but for me it's easier just to use Google Reader and have the blogs appear on my iGoogle page. I realized that I wasn't yet subscribed to my friend Nancy Bea's blog, so I thought I'd walk you all through it...
An iGoogle page is a personalized Google page. Besides searching the Web, I use mine to see new pictures from my friends' Flickr accounts, check my Calendar, look at weather reports, follow news articles, read the comics, and finally, follow blogs with Google Reader. If you have a Google Account, you can set up an iGoogle page of your own. From Google's main page, click Sign in in the upper right corner:
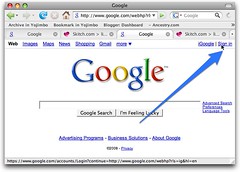
Next, enter your user name and password. Then click iGoogle, also in the upper right hand corner:
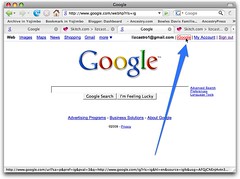
If you don't have Google Reader on your iGoogle page, just click the "Customize this page" link at the top right to add it.
Just type "Google Reader" into the Search for gadgets box and when Google Reader comes up, click the Add it now button under its logo:
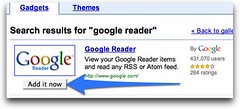
Here's what my iGoogle page looks like:
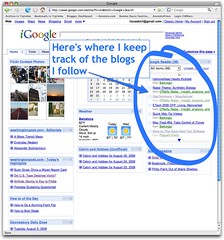
As you can see above, my Google Reader is in the top right corner. You can see the title of each new post along with the name of the blog that it comes from. I have it configured so that when I click on a post name, the post is expanded in a bubble:
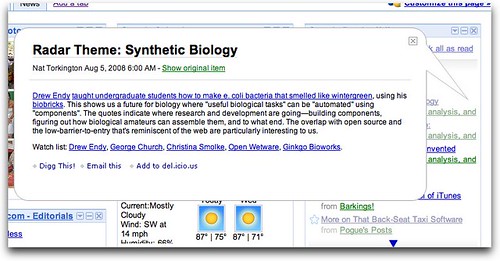
Some blogs let you read the entire post right here, photos and all. Others (like Zeldman's) only give you a brief excerpt and you click "Show original item" if you want to jump to the blog in question. (Configure your iGoogle gadgets by clicking the down arrow next to their names.)
OK, so how do we add a blog?
First, navigate to the blog you want to subscribe to.
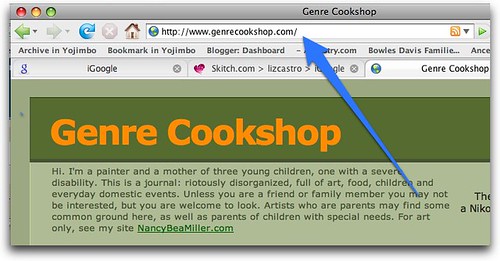
Next, find the Subscribe link or button. Nancy Bea doesn't have a "Subscribe" button per se, but down near the bottom of the page, you can find a little "atom.xml" link. That'll work too. Anything that says "atom", "RSS", "feed", or "Subscribe" should do the trick. In this case, we'll click that atom.xml link.
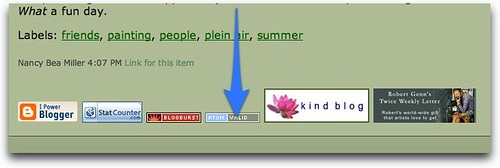
You'll jump to a page that displays the "feed" for the blog, that is, what is sent to subscribers.
Because of its extension, Firefox understands that it's a feed and asks if you want to subscribe. (I haven't tested this yet with Explorer, but I'll try to.) Choose Google from the "Subscribe to this feed using" menu and then click Subscribe Now.
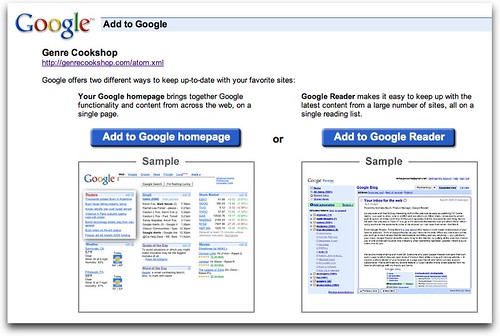
Google asks if you'd rather add the blog to your homepage or to Google Reader. If you want to see all the posts from a particular blog in one section on your iGoogle page, choose Add to Google homepage. I want all my blogs together in one section of my iGoogle page, so I choose Add to Google Reader.
You'll be transferred to Google Reader where you can adjust your settings, if necessary. (I didn't do anything here.)
When you next go to your iGoogle page, you'll see Nancy Bea's latest post in your Google Reader. It won't necessarily be up at the top of the list, since all your posts are in chronological order:
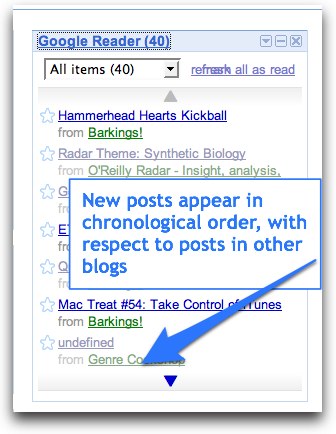
I'm also not sure why the title of her most recent post "More travels" did not appear here. It maybe the way the feed was constructed.
I have a pretty standard Subscribe button on this blog. Let's see if it works the same way.
So, navigate to my blog... oh, you're here already :)
My Subscribe buttons are below the labels. Click the Posts pop-up menu and then click "Add to Google".
This time we go straight to the choice between adding it directly to my iGoogle page or to Google Reader. I'll choose Google Reader again.
Next time you view your iGoogle page, you'll see the latest posts from my blog!
Let me know if that all makes sense and if it works in your browser.
Friday, August 01, 2008
Activity Monitor
For the last few months, my MacBook's fan seems to stay on way longer than necessary. I can close the MacBook's cover and still the fan is going like crazy. I'm not really sure what the problem is and for better or worse, the symptoms are not so severe to make me spend that much time troubleshooting until I find it.
This evening though, it seemed like it went on for more than normal. I tried quitting out of all my open programs (and it's true that there were quite a few) but it still wouldn't stop. A bit desperate, I opened up the Activity Monitor (it's in the Utilities folder) and clicked on "Disk Activity" in the header to the lower half of the window:
And I could at least see that I wasn't crazy and that the disk was being used and therefore something must still be going on.
That's when I realized that Photoshop was still open. I control-clicked its icon in the Dock and saw that the "Application was not responding" (or however they word it). Once I force quit (another option in that same menu), the Activity Monitor showed that the activity was lessening, and the fan finally stopped.
The other thing that I found interesting was the little CPU Usage window. To make it appear, choose Window > CPU Usage:
You can have it float above your other windows as you work in order to see which programs are taxing your CPU most. The idea is that if you feel like things are going slower than normal (or slower than you'd like), you might be able to pinpoint which program is the culprit. Or in my case, if the fan starts going crazy, and it corresponds with increased CPU activity, maybe I can figure out why.
Labels:
tech,
troubleshooting
Subscribe to:
Posts (Atom)