So, I had this inspiration the other day (as I'm wont to do... it always seems so much easier to have inspirations than to make them into reality). The inspiration was to create a wiki about an as yet unnamed topic. Then I had another inspiration... to explain how I create the wiki as I go along.
The first step was to buy the domain name for the wiki. I want it to have a simple and memorable name, both so that people can remember it, and also so that people searching for my topic may happen upon it through Google or other search engines. My web host, Lunarpages, offers a domain registration service. I can simply go to my Control Panel and buy a new domain.
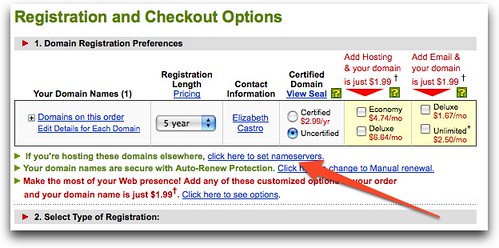
You can also register a domain at a big domain registrar like GoDaddy or Network Solutions. In that case, when you're buying the domain, make sure to specify the DNS servers of your web host. They tend to be a little sneaky about where to do such a thing since they'd really rather you host your site with them. Check out the tiny line below the main box with your info in it:

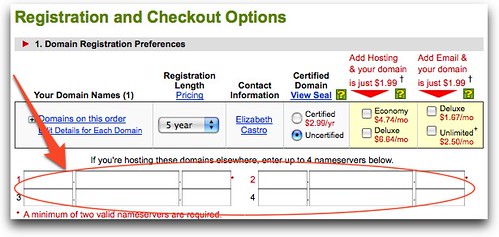
Once you click the "click here to set nameservers" button, you'll see a set of fields for setting up to four nameservers. You get the numbers needed here from your web host. It's much easier and faster to set them right now than go back and edit them later.

I've been pretty happy with Lunarpages. I've been using them for a few years now and they not only have given very good service, but every few months they send me an email offering me additional services to my account, at no extra cost.
The most important of these has been free add-on domains. That means that I can host an unlimited number of domains at my one site at no extra cost. So, once I've bought a new domain, I go to my Control Panel at Lunarpages and create an add-on domain. That means Lunarpages creates a folder for me for the new domain. That folder will be the root directory for my new web site.
The trick of course isn't in the buying, but in the name choosing. You want a name that is concise and illustrative of the site's content. If the name has more than one word, it helps to choose words that don't mix together visually. Something like "talllemons" makes your visitors have to think about all those 'l's more than whatever "tall lemons" might be. Better to use something like "tallyellowfruit" so your visitors can quickly read the three words even though there are no spaces between them.
Once you've got a place for your wiki to live, you can start creating it. I'm really happy with PmWiki for small wikis. It's robust and popular, and doesn't use a database. That means setting it up is as easy as uploading files to the server. I can get a new wiki up in less than half an hour. Here's how.
Go to PmWiki and download the latest version of the software. I recommend choosing the latest stable release instead of the latest beta version.
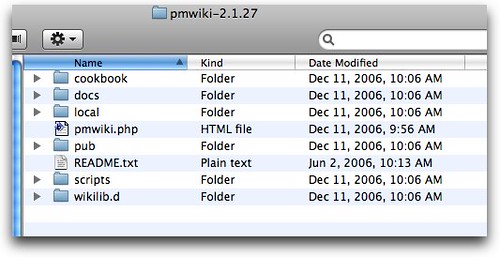
Unzip the file on your computer. It'll look like this:

Now comes the hard part... upload (say, with Fetch or CuteFTP) all of those files to your Web Host server. I put them in the root directory of my new domain since I want the wiki to be the main page at that domain. To check if everything's working correctly, go to your browser and point it to the pmwiki.php script in your new domain (say, http://www.tallyellowfruit.com/pmwiki.php).
But don't stop there. You still have to initialize the wiki. On your computer, open the "sample_config.php" file. Check the PmWiki Initial Setup Tasks page to see the basic changes you should make to the configuration file. Especially important is that you immediately change the administrator password. I also set the name of my new wiki, and the time format.
Finally, if you want to set the wiki as the default page for your domain, create a text file with the following line:
<?php include('pmwiki.php');Then save it with the name "index.php" and put it in the root directory of your domain.
Now test to see if it works by using your new domain name and nothing else (http://www.tallyellowfruit.com)
Next, we'll start to create the structure for the new wiki...

No comments:
Post a Comment