Are you sick of Times and Helvetica? Not to mention Trebuchet, Gadget, Arial, and Courier? It seems crazy in this day and age where you can output a gorgeous print document with beautiful fonts that the Web still be limited to a very short list of fonts. Especially since CSS has been capable of handling many more fonts for more than 10 years. But font foundries were wary of setting their fonts free and browser companies like Microsoft, Netscape, and Apple couldn't quite agree on what font format to support.
Thankfully, not everyone has been waiting around to see what shakes out, and have taken matters into their own hands. One of these guys is Garrick Van Buren, a developer in Minneapolis. He's gotten permission to make a big collection of fonts available on his server, for free, and figured out how to serve the appropriately formatted font to each browser as it requires. He told me there will be upwards of 400 new fonts by this weekend.
I've been itching to experiment with some new fonts... so I thought I'd give it a whirl. You can see the results right here in my blog. The title of my blog,
Pigs, Gourds, and Wikis as well as the sidebar headers, date header, and post headers are all set in
Taggeschrift, a sort of steampunk style font that matches the retro-newness of the topics I talk about here.
Here's how I did it. (Note, I haven't posted all the screenshots to this article, some are linked so they don't distract so much from the text. If they're particularly big but necessary, I insert a smaller version. Click on it to see the full version.)
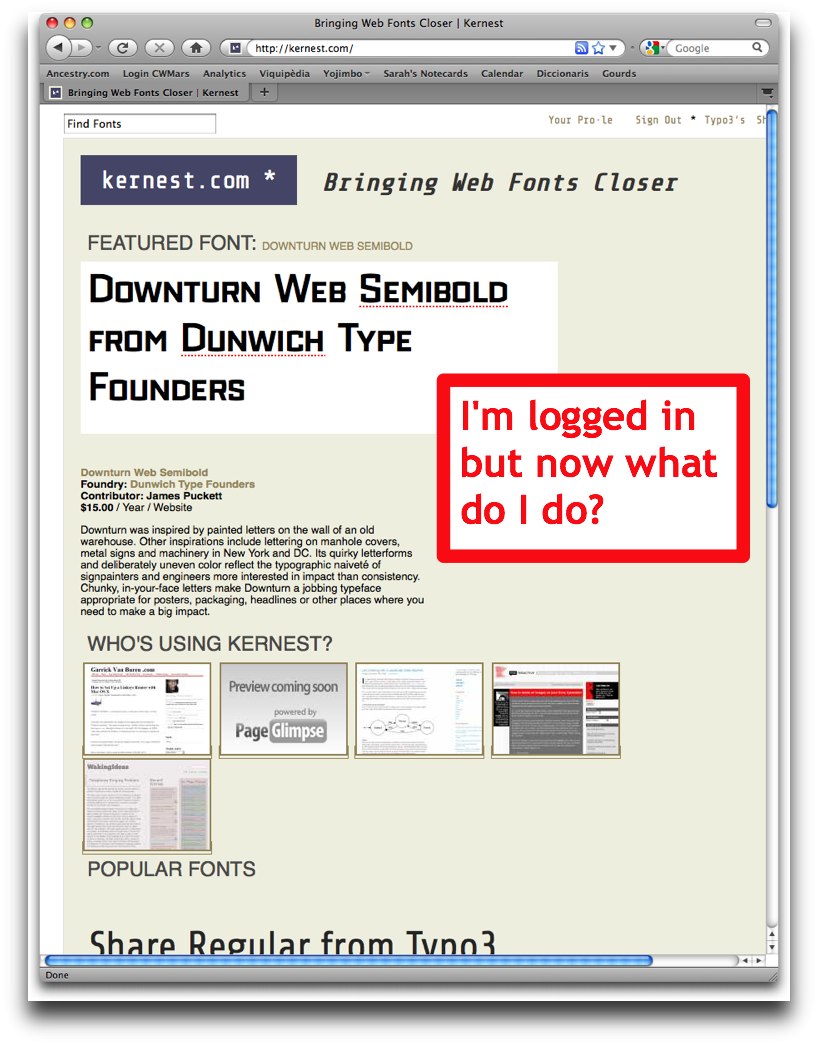
First, go to
Kernest.com and
log in. Make sure you write down your password because there's not an easy way to recover one yet if you forget it (like I did :) though Garrick is working on it.
Maybe it's me, but once I logged in I wasn't quite sure what to do.
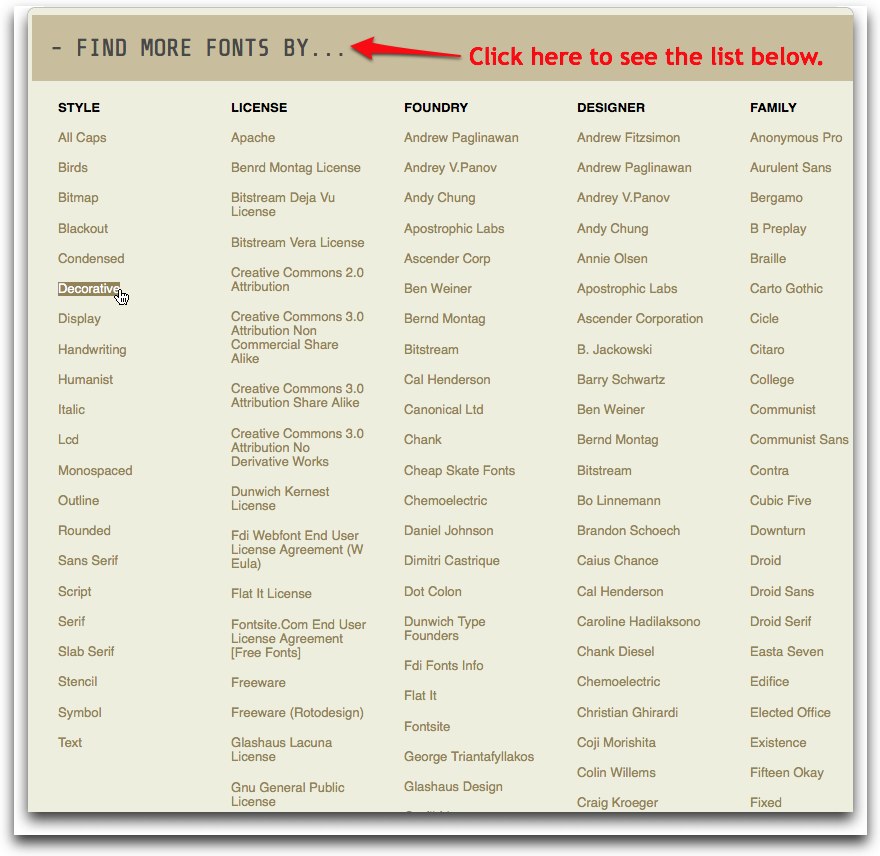
So I'll tell you... go looking for fonts. See if you like any. Click on the Find more fonts by... link to see all the fonts in Kernest's collection sorted by style, license, foundry, designer, or family.
Once you're within a category, you'll see samples of the fonts themselves. If you're curious about a font, click it's sample text.
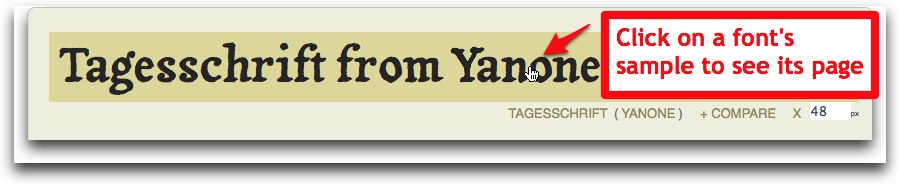
You'll get to the font's page on Kernest (notice the URL is http://kernest.com/font-name). You can type new sample text in the box at the top, perhaps to see how a particular header might look. And you can also just view the font at various standard sizes.
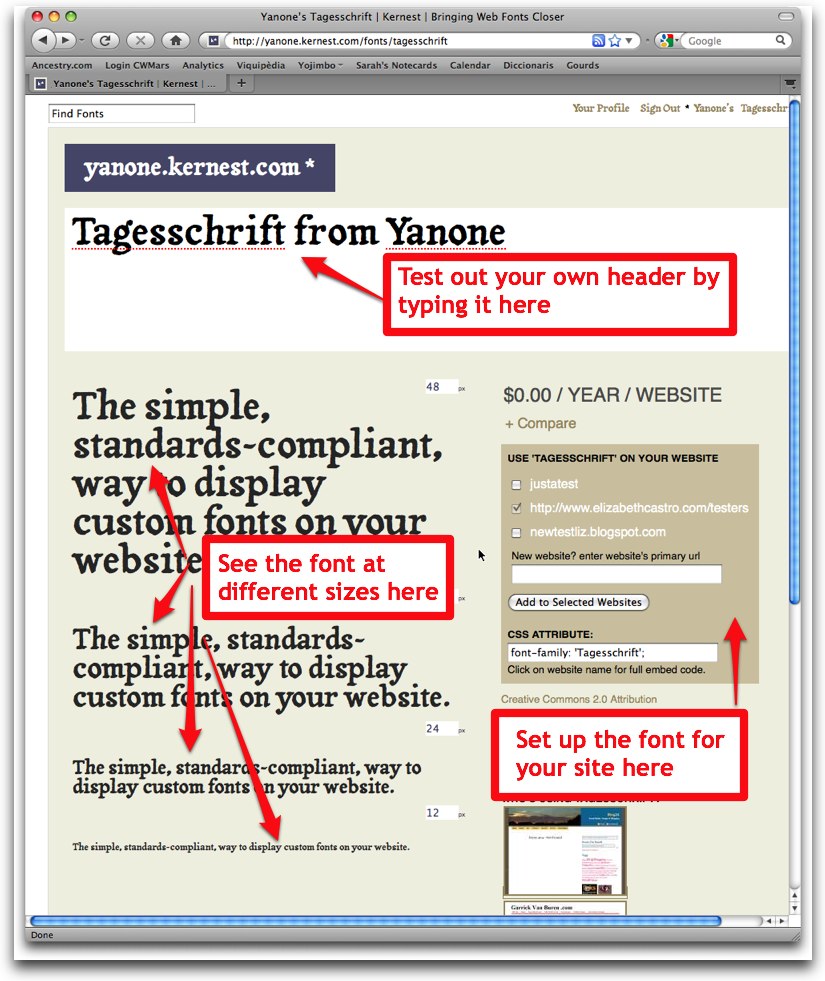
To use a font on your site, you need to add it to a
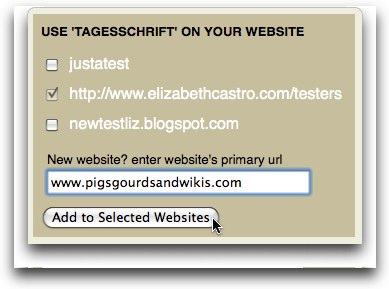
project. A project is just another name for the web site where you're going to use the font. You add a project to your profile by adding its URL to the New website? box. If you've already created the project, it will appear in the USE '[THIS FONT]' ON YOUR WEBSITE box, and all you have to do is check it's name or URL. Otherwise, type its name in the New Website? box. Either way, you'll then click the Add to Selected Websites button.
A message will
momentarily flash at the top of your screen saying the font was added to your project, but I didn't find it particularly obvious how to use that information. The key is in the second sentence:
Click project name's for embed code. (It means
Click the project's name to get the embed code.)
So that's what we'll do. In that little beige box where you just clicked "Add to Selected Websites" you should now see the title of your project turned into a link. Click it.

This will bring you to your project page, found at http://kernest.com/projects/[your project name], where your project name may have the dots replaced by dashes. And it's where you'll find the needed code.
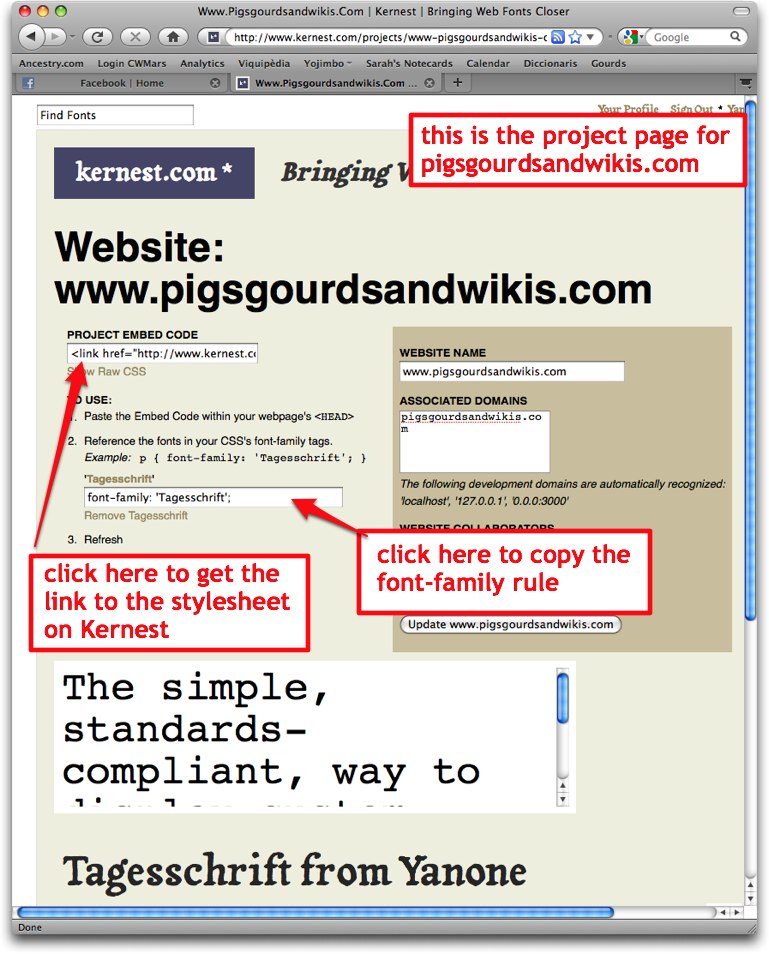
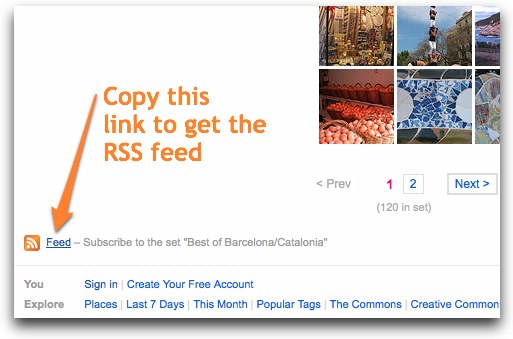
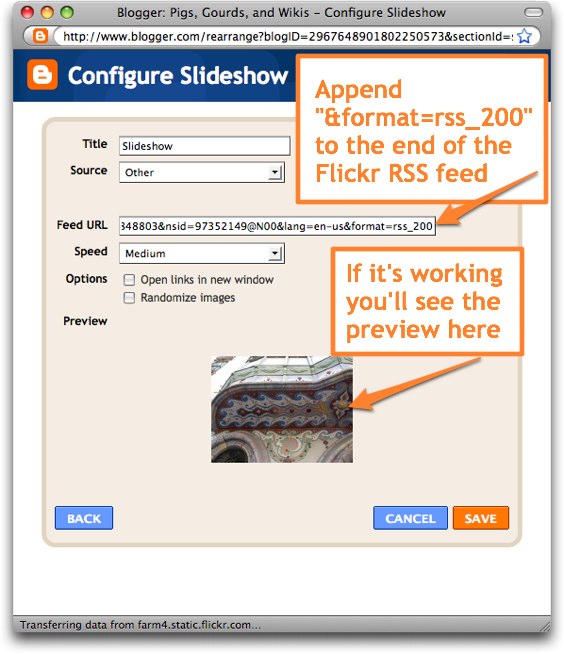
You basically need two chunks of code, as my 3rd edition HTML book explained more than 10 years ago. First, you need to import the font using the @font-face rule. Kernest makes it relatively easy by creating a CSS style sheet on its server that contains the rule that you'll need for your site. To use it all you have to do is click in the PROJECT EMBED CODE box, and copy everything that's there. If you want, click the
Show Raw CSS link to see exactly what the style sheet looks like. It's pretty straightforward. The link will look something like this:
<link href="http://www.kernest.com/www-pigsgourdsandwikis-com.css" media="screen" rel="stylesheet" type="text/css" />
(You can get more information about linking stylesheets on page 129 of my
HTML, XHTML, amd CSS, Visual Quickstart Guide, Sixth Edition.)
If you like, you can copy the @font-face rule out of the style sheet and paste it directly into your own CSS style sheet. It's up to you. The advantage to leaving it on Kernest is that if you add a font later, the style sheet and rule will be automatically updated.
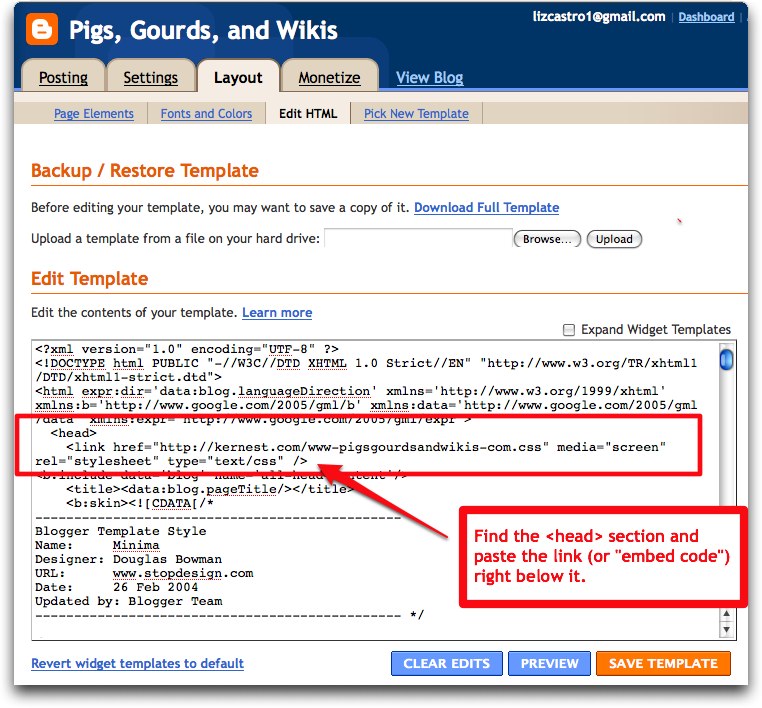
Now, where do you put that "embed code" or link element, which is nothing more than a link to the CSS stylesheet on Kernest? Anywhere in the <head> area of your Web site, preferably up near the top.
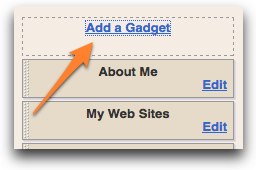
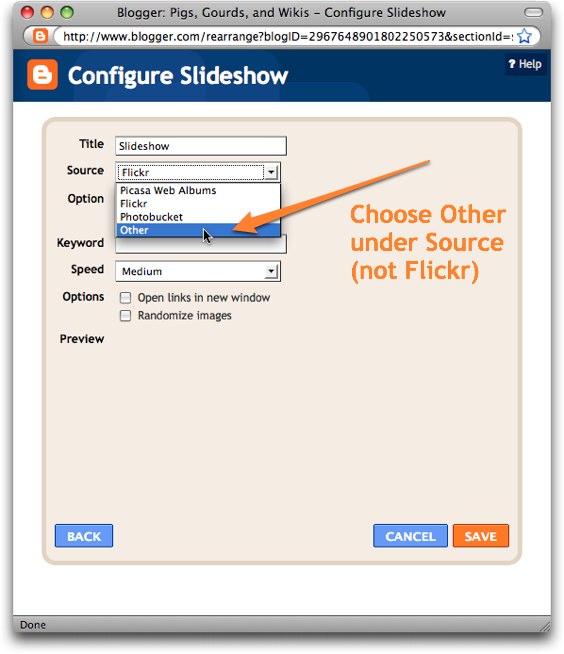
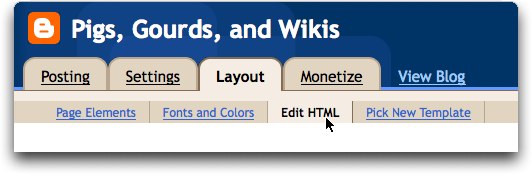
In this example, we're going to use it for a blog, so we have to dive into Blogger's innards. Go to your Dashboard on Blogger, and click Layout under your desired Blog.
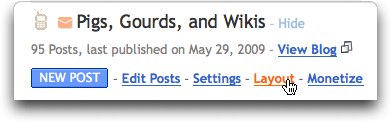
Then choose Edit HTML from the Layout tab.
Now you'll see the HTMLly underbelly of your blog. Right there at the top, you should see the <head> section where you can stick in the link to your new Kernest stylesheet. Paste it right in.
OK, now Blogger can import the font, but it doesn't know where you want to use it. In a simple Web site, you'd just need to set up some font-family CSS rules and apply them to different selectors, perhaps you want the h1 elements to use one font and the body to use another.
Blogger however, has another layer of information that goes on between its database and the output, namely a number of
variables. Currently, Blogger has five text variables. In the Minima template that I'm using as a base, they're defined right up at the top of the stylesheet, just below the <head>. Scroll down a bit and you'll see them. The first chunk of them are variables that affect the color of objects, and the last five have to do with fonts. (It's set up this way so that you can change them by using the Fonts and Colors tab, but we're going to bypass that simpler but very limited system.)
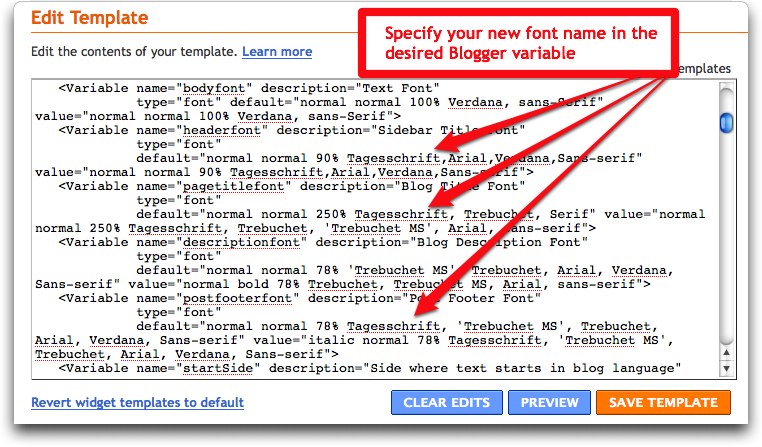
The first of the five text variables is called "bodyfont". It affects every bit of text on the page, including, but not limited to the body text, the sidebars, the headers, everything. Think of it as the base style for your entire body.
The second variable is "headerfont" but it really only applies to the Sidebar headers and the Date Header (which appears above blog posts). This is a good place to use your new font. In Blogger's Minima style, there is a list of fonts that will be used, in order of preference. Replace the first font on the list with your new font from Kernest. You should probably use quotes if you've got a multi-word font name, otherwise, don't.
Variable number 3 is "pagetitlefont" and is only used in the Header area for the title of your blog. I used Tagesschrift here too.
The fourth text variable is called "descriptionfont" and is used exclusively for the description text that appears below the title of your font in the header. My steampunk font is a bit wobbly for that little text, so I left it in Trebuchet.
The last text variable is "postfooterfont" and as expected, affects the text that appears in the footers below a blog post that contain the name of the blogger, the time the blog was posted, whether or not there are comments, etc. Strangely enough, it also is used for some bits and pieces of the sidebars (though not the sidebar headers).
Of course, all this is all specific to Blogger's Minima template. You may need to dig in and experiment with your own template to see what each variable applies to.
Even when you've figured out the variables in a given Blogger template, you'll realize that some of the variables are way too broad (like bodyfont) and some are way too specific (like descriptionfont), or at the least, there aren't enough of them. That's when you dive into the CSS rules themselves. Scroll down a little further and you'll see the CSS rules that are applied to each and every element on your Blog.
Don't know what kind of element something on your blog is? View your blog and View source. Search for the text in the element and then sleuth out what kind of element it is. Then go back to Blogger's Edit HTML page and find the offending element. Then change the font-family, (or the size, style, or color) as you like.
For example, to change the font of the Blog post titles, I had to scroll down until I found the .post h3 selector which controls them. Then I added the font-family: 'Tagesschrift'; rule.

Use Blogger's Preview button copiously to view the changes to your blog before you publish them and make them live. Be sure and test it in as many browsers as you can. As far as I can tell, Kernest's font serving system works great at least in Firefox, Safari, and Internet Explorer, which covers the vast majority of my visitors. And it looks cool!
Here's what this site looked before Kernest:

And here's what it looks like now: (course you can see it right here as well):


 If you viewed my other blog last week, you would have seen a rather unwieldy, definitely endless list of labels like the one shown at left. Labels are Blogger's way of helping you categorize your blog posts so that readers can jump to an entire set of posts of interest. However, as the list gets longer, and disappears off the bottom of the screen, it also gets a lot less useful.